
Ooooh, Darlings! I feel a tutorial coming on. Mercy, I’m rather woozy. Oh dear — whatever shall I do?
Well, I suppose there’s nothing for it but to give in to the urge. So — wanna see how I make jeans for my contemporary characters? I’ll give you a hint: it’s not by sewing teeny-tiny little flat felled seams and perfect topstitching. No way I could do that at the right scale for an 18″ doll. Heck, I can hardly sew perfect topstitching at any scale!
It’s all an illusion created with paint and glue. I’ll show you how:
First of all, let’s analyze what it is that makes jeans seams look like jeans seams (this is a picture of real ones):
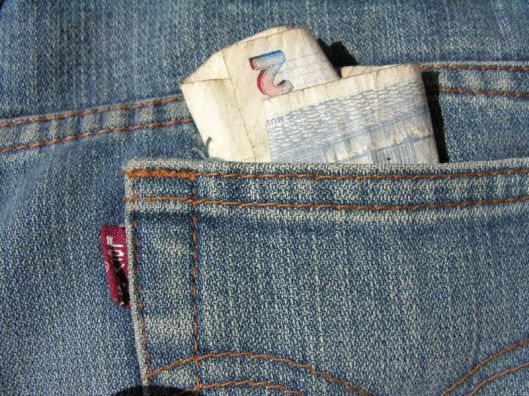 Photo credit: Juli on Flickr
Okay, so first of all, there’s the double line of topstitching, which everyone associates with jeans. You’ll find it on all the seams that have been flat felled (those bulky seams where the fabric has been doubled over). It’s also on the pockets and the fly. But pay attention, and you’ll see that it’s not just the topstitching that makes this look like a pair of jeans. It’s the nature of the denim. Denim fades quite readily where it is abraded. (That’s why your old jeans have light patches on the seat and the thighs.) So the parts of the seams that are most exposed, like the edges, and where the fabric is pushed up by the seam allowance below, are strongly faded. Also, because of the thickness of the fabric, the denim buckles along those bulky areas, and develops those distinctive light and dark areas. Finally, there are shadow lines created by the folds of the seams and by the stitching itself.
So what we want to do, besides putting on the orange topstitching lines, is reproduce the effect of abrasion and shadows. Okay, here’s the front of the jeans, with the crotch sewn together in an ordinary seam.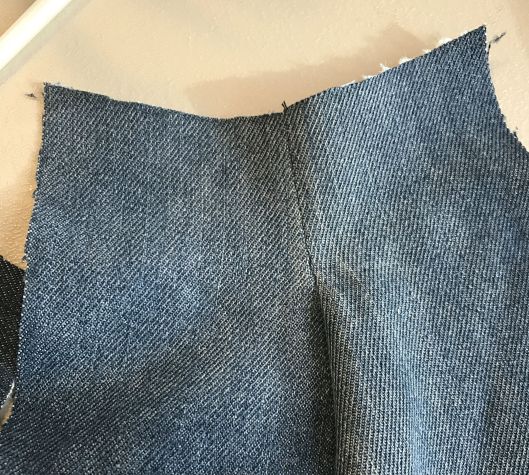
The first thing I do is paint a white line along the very edge of the seam where the fabric would be faded by abrasion.
Next, I paint parallel white line where the fabric would be pushed up by the bulk of the seam allowance underneath. In this picture the lines look pretty sharp and crisp. After I took the picture I softened them up a little bit by brushing some water over them before the paint was dry.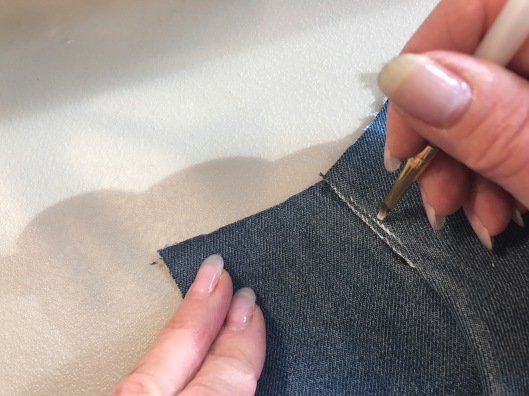
Now I want to put in the light and dark areas where the fabric would have buckled. This is a little bit like stripes between the white lines, but irregular and kinda blurry. You can add some dark paint in between the light areas for further emphasis if you need it. In this picture I have completed that part and am starting to put in the topstitching for the fly. I have discovered that orange paint for the topstitching is way too bright at this scale. I use a rusty brown color instead.
Okay, I’ve finished painting the topstitching. Now, if it were real stitching the tension of the threads would create a slight ditch in the fabric. So there would be very faint shadow lines. Then the fabric immediately adjacent to the ditch to be ever so slightly more exposed and thus would abrade a little bit. So — to create that effect I add dark lines beside the topstitching, and white lines beside those. The important thing here is to keep the paint lines very, very subtle. You can’t even really see the dark lines in this picture, but they’re there, and in real life they do contribute to the illusion.
Now, on real jeans, the fly is a very bulky area. There are multiple layers of denim, plus the zipper tape here. So it’s going to protrude from the surrounding fabric a good bit. Where that protrusion ends, there’s going to be a shadow. So I put in dark lines on the outside of the fly, both adjacent to the topstitching and where the fly meets the other side of the pants front.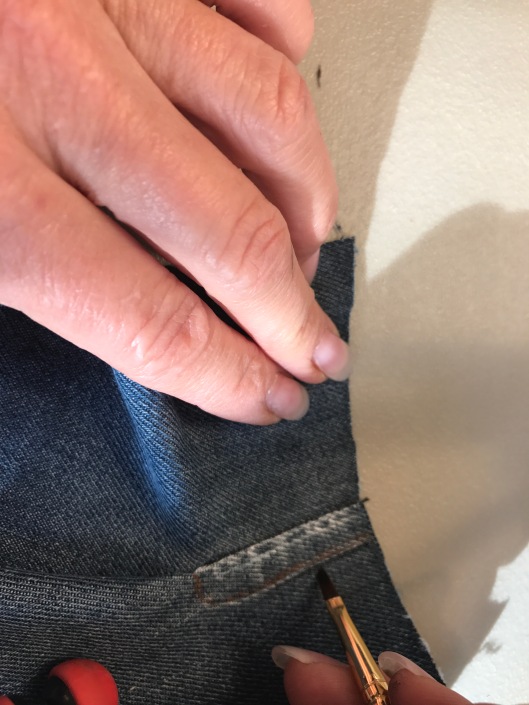
Soften out the edges of those dark lines, and you have a pretty good suggestion of three dimensions. See how the fly seems to protrude? In this picture I’ve also added the reinforcement “stitching” near the bottom of the fly, and I’m starting on the pocket.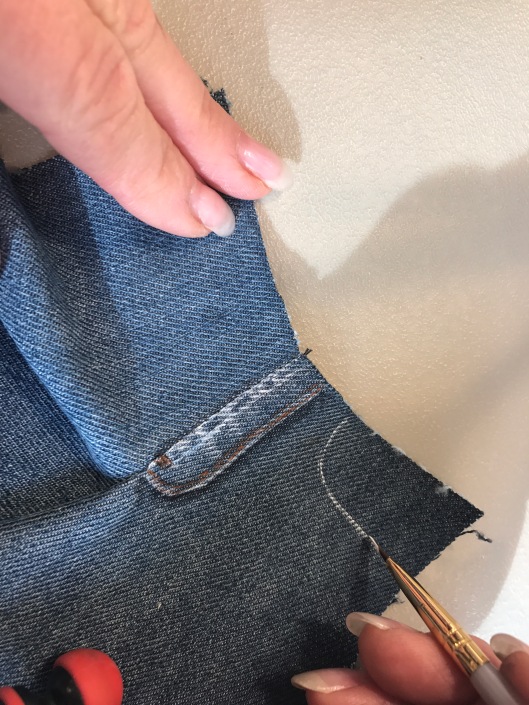
Again, you want a pretty strong shadow here because the edge of the pocket protrudes a good bit from the fabric behind it.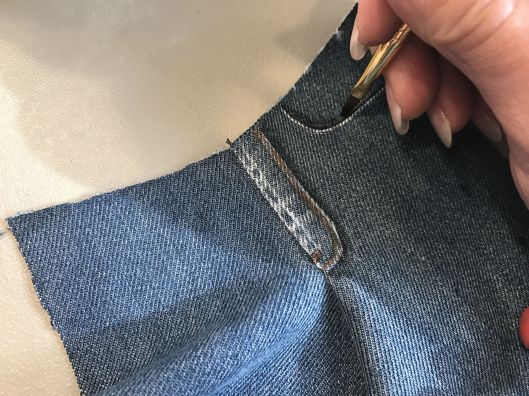
There. Just follow the same process for the rest of the front of the jeans: topstitching with very slight shadows and abrasion on either side, lights and darks where the denim buckles between the lines of topstitching, subtle shadow lines where the fabric falls away from the seams, and stronger ones behind the pockets. Also notice that I have put in some distressing where the hipbones would rub against the inside of the fabric. After this picture was taken, I also painted the crotch seam, using the same process, to look like it had been flat felled. 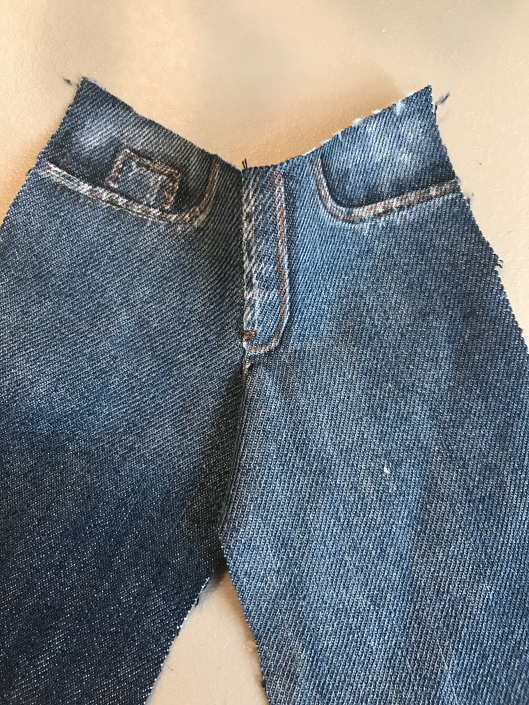
Do the back of the jeans the same way, creating the illusion of a back yoke and a flat felled crotch seam.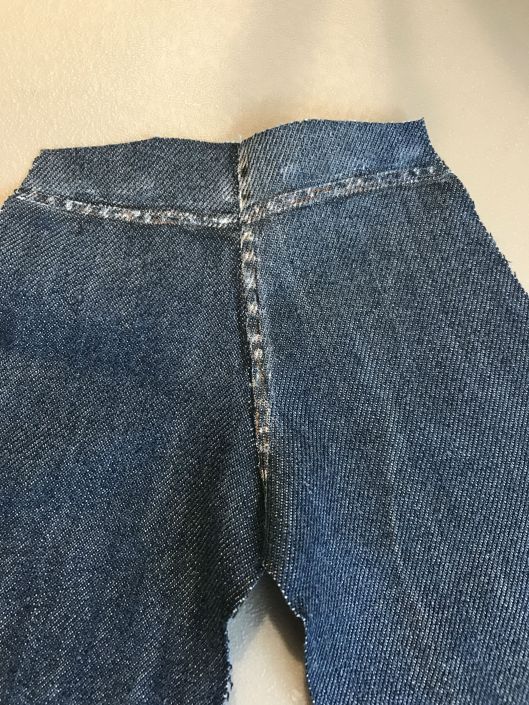
Okay, now for the back pockets. You could do them the same way, creating an illusion of pockets entirely with paint, but it’s pretty easy to do them separately and glue them onto the back of the jeans. It makes the piece just a little bit more realistic. Notice the shadow lines along the decorative topstitching? Because there’s no extra bulk of a seam allowance under this stitching the abrasion is minimal, but the stitching still creates a little bit of a ditch.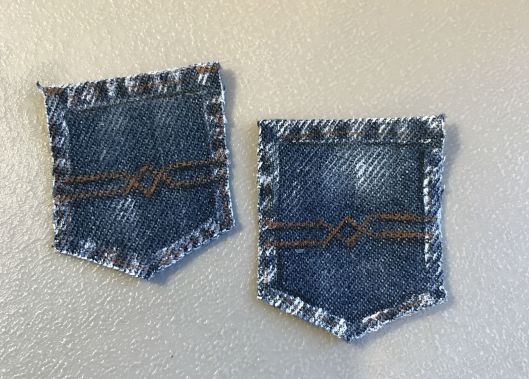
Now stitch the front and back of the pants together and “hem” the legs by gluing the edges under. Paint the hemlines and the inseams, but notice on your own jeans that the outseams are just regular seams. I don’t know why it’s like that, but it almost always is. So don’t paint them.
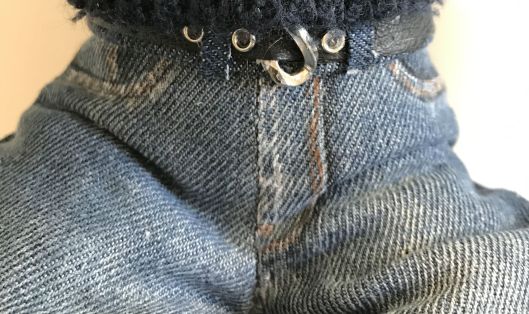
The waistband is a strip of fabric with the edges turned under and glued. The belt is glued over the top of that, and the belt loops go on last. I just do a single layer of fabric for the belt loops, with seam sealant on the edges. To try to turn the edges under is just too bulky. They look a little rough in this close-up photo, but when you are looking at the finished doll I think they look okay. Glue the waistband to the top of the pants.
I used a link from a chain for the belt buckle and some little jump rings to look like eyelets for the belt holes.
If you want, you can make the jeans look worn by “distressing” them with some more white paint where the fabric would fade: the seat, thighs, knees, etc. Keep this paint pretty thin so it will sink into the denim and look like the fabric has faded, not like you’ve painted it. You can also add stains, rips, etc, if you really want the jeans to look broken in.
And there you have it! Jeans that look like your doll has lived in them forever!
